How to Save Time and Get Straight to Dyeing
- Jessica Lambert

- Sep 12, 2020
- 6 min read
When I started dyeing with actual planned recipes rather than what I call the "splashing around approach" where you just apply dye somewhat randomly and see what you end up with. I was caught off guard with how much time I was spending on designing colors, doing math, and measuring, basically I spent hours prepping to dye and then spent approximately 30 minutes actually applying dye to yarn. Given that I have 4 small children and therefore very little time, I needed to find ways to maximize that time. I didn't want to spend hours punching values into a calculator, just to spend another hour or two measuring and mixing and then feel rushed on the dyeing part or even have to put it off until another day.
One thing that has helped me more than any other tool is, drum roll please............................................
Spreadsheets! *cue evil laughter and a thunder clap in the background*
Seriously though, as creatives we can be intimidated by spreadsheets because the are just so logical and exact but being in my opinion being chaotic and disorganized is not the same thing as being creative and if we keep some things organized it can give us more space and time to really go nuts on the more artistic bits. So I really encourage you to push past any fears or negative feelings you may have and keep reading because honestly friends, if I had to choose between google sheets and my utility sink I might just go back to hauling buckets to the garage. That's how much time and energy using google sheets has saved me. So this post is the first of a three part series in which I will show you three ways to use google sheets to help you streamline the math and planning part of the process and get straight to dyeing And you don't even have to learn how to do spreadsheets if you don't want to because everyone of these demos comes with a link to a google sheet I have already created you just make yourself a quick copy and start using it right away.
So today I'm going to show you what I call"My Colorway Catalog" which is a quick record keeping spreadsheet that allows me to record colorway recipes. But the real magic of using a spreadsheet is not just its ability to hold data but how you can use it to quickly lookup what you want from those records. Let me show you:
This is the "Lookup" sheet, which you can use to look up information on a colorway recipe you have previously recorded:

In the large, blue shaded cells you enter in the name of the colorway you want to look up, the weight of fiber (WoF) you want to dye in that colorway, and the depth of shade percentage (DoS) of the primary dye stocks you are going to use.
See this it action:
The Lookup page will then display the main details you need for dyeing that colorway. First there is a photo of the finished skein. Then, in the pink chart, you have your application methods displayed and the colors that are applied in that layer.

So In the fictional colorway displayed above there are three layers. In the first layer the colors A and B are hand-painted on the yarn, in the second layer colors C and D are added to a ow-Immersion dye bath. Finally, Color E is applied in the third layer as a full immersion dye.
On the right, in the teal shaded chart you have your colors. The Lookup page can display up to five different colors per colorway and each color gets its own section:

Next to each color name is the coverage, or how much of the skein you should apply that color to. And under each color you have the names of your dye primaries here I've given my primaries the very creative names of ColorA 1 ColorA 2 and so on. But normally these would say something like "Dharma Lemon Yellow" or "Jacquard Crimson" or whatever dyes you actually use. Underneath the names of each primary is where you will find the amount of dye stock in milliliters you will need for that color. In the "Water in Ml" column the value displayed refers to the maximum amount of water you can add to the mixed dye for use in a hand-painted or space-dyed method. This value will appear red when it is negative which indicates you will need to use a higher DOS% in your primary dye stocks if you want to do a hand-painted method. You can ignore this column if you only do immersion dye techniques.
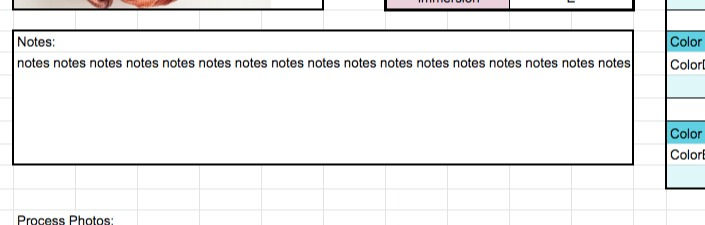
There is also a space for notes in which I have so helpfully written, "notes notes notes" over and over. But which you can use to include any information you will need to dye this colorway such as, "hand-paint in a zig-zag pattern" "add soda ash last", etc.
And finally there is space for three "Process photos" which I find helpful to show what the colorway looks like at various steps.

these photos aren't even all from the same colorway but you get the picture.
But before you can use "My Colorway Catalog" to look up recipes you have to record them. So to do that you will have to select one of the other sheets at the bottom of the page called "Catalog"

Then you enter in the name of your colorway, the total weight of fiber of your sample and the DoS % of the primary dye stocks you used in dyeing this sample. Then you can add in the application method for your first layer and the colors that were applied in this layer. The last column on this sheet is for photos of your finished skein.
Next move on to the "Notes" sheet. The name of your colorway will autofill and then you can type in your notes. There is also the option of inserting up to three process photos for reference.
Next, you're ready to add in your dyes. For this, start with "Color_A". Again the name of your colorway will autofill, so first thing you enter in is the coverage, you can be as vague or exact as you like here. You can get out a tape measure and calculate what percentage of the total length of the skein this first color covers but that only works if you colors are applied in large blocks. I usually guesstimate. Then you enter the name of your dye and how many milliliters you mixed into this color. (Or how much you plan to mix, if you're cataloging in advance like I sometimes do.) If you only used one dye you can stop here or move onto the "Dye Name 2" column. Each color can include up to 4 primary dyes. I never use more than this myself.
Then you do the same thing for any other colors you have in this colorway: put the info for your next color in "Color_B" and the next after that in "Color_C" and so on.
And that's it! once you have your colorway recipe recorded it is easily to look up and scale in the "Lookup" sheet. Which means you can dye more of this colorway at a moments notice!
But what if you don't like a colorway that you have dyed? What's the good of cataloging it then? Well you can write what you learned in the notes which could be very helpful to refer to in the future but you can also quickly make a new version of the recipe by copying and pasting the rows of the current colorway and pasting them one row below. Then you edit the fields you want to change. In this clip I adjust turquoise by 5 ml.
You'll notice I also changed the name to differentiated between the two and deleted the finished skein photo because it will not accurately represent this new iteration of the colorway (technically it doesn't represent the current colorway either but that's just because I'm using dummy data)
Then of course because your confidence is shaken you change the WoF in Lookup to 20 so you can test out a mini skein before you dye it for real.
And now you can test out this new colorway and hope for better results.
So to get started with your own Colorway Catalog you will need an account with google so you can access google sheets next click here to access the template. The template is set to view only so you will have to make a copy to start using it. You do this by clicking "file" and selecting "make a copy" then rename it whatever you like and then you can start recording your recipes.
Happy dyeing!
Next in this series: The Dye Calculator. How to use a spreadsheet to minimize the math.


Comments